ISPConfig - ставим хостинг [RHEL6]
Будем исходить из того, что CentOS/RHEL/OracleLinux 6-й версии у нас уже установлен, сеть настроена.
Код: Выделить всё
[root@server ~]# ifconfig
 eth0      Link encap:Ethernet  HWaddr 00:0C:29:3E:29:60
           inet addr:192.168.0.100  Bcast:192.168.0.255  Mask:255.255.255.0
           inet6 addr: fe80::20c:29ff:fe3e:2960/64 Scope:Link
           UP BROADCAST RUNNING MULTICAST  MTU:1500  Metric:1
           RX packets:192 errors:0 dropped:0 overruns:0 frame:0
           TX packets:145 errors:0 dropped:0 overruns:0 carrier:0
           collisions:0 txqueuelen:1000
           RX bytes:18154 (17.7 KiB)  TX bytes:17645 (17.2 KiB)

 lo        Link encap:Local Loopback
           inet addr:127.0.0.1  Mask:255.0.0.0
           inet6 addr: ::1/128 Scope:Host
           UP LOOPBACK RUNNING  MTU:16436  Metric:1
           RX packets:30 errors:0 dropped:0 overruns:0 frame:0
           TX packets:30 errors:0 dropped:0 overruns:0 carrier:0
           collisions:0 txqueuelen:0
           RX bytes:2172 (2.1 KiB)  TX bytes:2172 (2.1 KiB)

[root@server ~]#Код: Выделить всё
192.168.0.100 server.test.kg serverОтключаем selinux
Код: Выделить всё
[root@server ~]# cat /etc/selinux/config
# This file controls the state of SELinux on the system.
# SELINUX= can take one of these three values:
#     enforcing - SELinux security policy is enforced.
#     permissive - SELinux prints warnings instead of enforcing.
#     disabled - No SELinux policy is loaded.
SELINUX=disabled
# SELINUXTYPE= can take one of these two values:
#     targeted - Targeted processes are protected,
#     mls - Multi Level Security protection.
SELINUXTYPE=targeted
[root@server ~]# rebootКод: Выделить всё
[root@server ~]# chkconfig iptables off
[root@server ~]# service iptables stop
[root@server ~]# iptables -L
 Chain INPUT (policy ACCEPT)
 target     prot opt source               destination

 Chain FORWARD (policy ACCEPT)
 target     prot opt source               destination

 Chain OUTPUT (policy ACCEPT)
 target     prot opt source               destination
 [root@server ~]#
Код: Выделить всё
 [root@server ~]# rpm --import /etc/pki/rpm-gpg/RPM-GPG-KEY*
[root@server ~]# rpm --import http://dag.wieers.com/rpm/packages/RPM-GPG-KEY.dag.txt
[root@server ~]# rpm -Uvh http://pkgs.repoforge.org/rpmforge-release/rpmforge-release-0.5.2-2.el6.rf.x86_64.rpm
[root@server ~]# rpm --import https://fedoraproject.org/static/0608B895.txt
[root@server ~]# rpm -Uvh http://download.fedora.redhat.com/pub/epel/6/i386/epel-release-6-5.noarch.rpm
Ставим плагин для yum позволяющий выставлять приоритеты репозиториям
Код: Выделить всё
[root@server ~]# yum install yum-prioritiesКод: Выделить всё
[root@server ~]# nano /etc/yum.repos.d/epel.repo
[epel]
name=Extra Packages for Enterprise Linux 6 - $basearch
#baseurl=http://download.fedoraproject.org/pub/epel/6/$basearch
mirrorlist=https://mirrors.fedoraproject.org/metalink?repo=epel-6&arch=$basearch
failovermethod=priority
enabled=1
priority=10
gpgcheck=1
gpgkey=file:///etc/pki/rpm-gpg/RPM-GPG-KEY-EPEL-6Код: Выделить всё
[root@server ~]# yum updateКод: Выделить всё
[root@server ~]# yum groupinstall 'Development Tools'Код: Выделить всё
[root@server ~]# yum install quotaКод: Выделить всё
#
# /etc/fstab
# Created by anaconda on Mon Jul 11 16:29:27 2011
#
# Accessible filesystems, by reference, are maintained under '/dev/disk'
# See man pages fstab(5), findfs(8), mount(8) and/or blkid(8) for more info
#
/dev/mapper/vg_server1-lv_root /                       ext4    defaults        1 1
UUID=6a119ddb-46eb-4054-a17c-8968ea87369f /boot                   ext4    defaults        1 2
/dev/mapper/vg_server1-lv_swap swap                    swap    defaults        0 0
tmpfs                   /dev/shm                tmpfs   defaults        0 0
devpts                  /dev/pts                devpts  gid=5,mode=620  0 0
sysfs                   /sys                    sysfs   defaults        0 0
proc                    /proc                   proc    defaults        0 0
UUID=86d01758-1c06-48a1-9beb-1ffff51d9a1c /home   gfs2   _netdev,rw,locktable=hosting:data,lockproto=lock_dlm,usrjquota=aquota.user,grpjquota=aquota.group,jqfmt=vfsv0   0 0
Пусть вас не пугает многабукаф в опциях - это просто раздел на внешнем сетевом хранилище цепляемый по iSCSI, отформатированный в gfs2 и примонтированный с соответствующими опциями. )))UUID=86d01758-1c06-48a1-9beb-1ffff51d9a1c /home gfs2 _netdev,rw,locktable=hosting:data,lockproto=lock_dlm,usrjquota=aquota.user,grpjquota=aquota.group,jqfmt=vfsv0 0 0
Чтобы раздел "подхватил" изменения его надо перемонтировать
Код: Выделить всё
[root@server ~]# mount -o remount /homeКод: Выделить всё
[root@server ~]# quotacheck -avugm
[root@server ~]# quotaon -avugКод: Выделить всё
[root@server ~]# yum install ntp httpd mod_ssl mysql-server php php-mysql php-mbstring phpmyadminудаляем Dovecot если вдруг он установился по дефолту (RHEL это любит делать)
Код: Выделить всё
[root@server ~]# yum remove dovecot dovecot-mysqlКод: Выделить всё
[root@server ~]# yum install rpm-build gcc mysql-devel openssl-devel cyrus-sasl-devel pkgconfig zlib-devel pcre-devel openldap-devel postgresql-devel expect libtool-ltdl-devel openldap-servers libtool gdbm-devel pam-devel gamin-devel libidn-develКод: Выделить всё
[root@server ~]# useradd -m -s /bin/bash raven
[root@server ~]# passwd ravenКод: Выделить всё
[root@server ~]# visudoКод: Выделить всё
%raven ALL=(ALL) NOPASSWD: ALL
Из-под созданого нами позьзователя выполняем все необходимое для сборки rpm (создаем структуру папок и т.п.):
Код: Выделить всё
[root@server ~]# su raven
[raven@server ~]$ mkdir $HOME/rpm
[raven@server ~]$ mkdir $HOME/rpm/SOURCES
[raven@server ~]$ mkdir $HOME/rpm/SPECS
[raven@server ~]$ mkdir $HOME/rpm/BUILD
[raven@server ~]$ mkdir $HOME/rpm/BUILDROOT
[raven@server ~]$ mkdir $HOME/rpm/SRPMS
[raven@server ~]$ mkdir $HOME/rpm/RPMS
[raven@server ~]$ mkdir $HOME/rpm/RPMS/i386
[raven@server ~]$ mkdir $HOME/rpm/RPMS/x86_64
[raven@server ~]$ echo "%_topdir $HOME/rpm" >> $HOME/.rpmmacros
[raven@server ~]$ mkdir $HOME/downloads
[raven@server ~]$ cd $HOME/downloadsКод: Выделить всё
[raven@server ~]$ wget https://sourceforge.net/projects/courier/files/authlib/0.63.0/courier-authlib-0.63.0.tar.bz2/download
[raven@server ~]$ wget https://sourceforge.net/projects/courier/files/imap/4.9.3/courier-imap-4.9.3.tar.bz2/download
[raven@server ~]$ wget https://sourceforge.net/projects/courier/files/maildrop/2.5.4/maildrop-2.5.4.tar.bz2/download
Код: Выделить всё
[raven@server ~]$ sudo rpmbuild -ta courier-authlib-0.63.0.tar.bz2
[raven@server ~]$ sudo ls -l /root/rpmbuild/RPMS/x86_64
-rw-r--r-- 1 root root 124296 Aug 11 17:27 courier-authlib-0.63.0-1.el6.x86_64.rpm
 -rw-r--r-- 1 root root 259620 Aug 11 17:27 courier-authlib-debuginfo-0.63.0-1.el6.x86_64.rpm
 -rw-r--r-- 1 root root  35044 Aug 11 17:27 courier-authlib-devel-0.63.0-1.el6.x86_64.rpm
 -rw-r--r-- 1 root root  17416 Aug 11 17:27 courier-authlib-ldap-0.63.0-1.el6.x86_64.rpm
 -rw-r--r-- 1 root root  13944 Aug 11 17:27 courier-authlib-mysql-0.63.0-1.el6.x86_64.rpm
 -rw-r--r-- 1 root root  13112 Aug 11 17:27 courier-authlib-pgsql-0.63.0-1.el6.x86_64.rpm
 -rw-r--r-- 1 root root   8316 Aug 11 17:27 courier-authlib-pipe-0.63.0-1.el6.x86_64.rpm
 -rw-r--r-- 1 root root  34168 Aug 11 17:27 courier-authlib-userdb-0.63.0-1.el6.x86_64.rpm
Код: Выделить всё
[raven@server ~]$ sudo rpm -ivh /root/rpmbuild/RPMS/x86_64/courier-authlib-0.63.0-1.el6.x86_64.rpm /root/rpmbuild/RPMS/x86_64/courier-authlib-mysql-0.63.0-1.el6.x86_64.rpm /root/rpmbuild/RPMS/x86_64/courier-authlib-devel-0.63.0-1.el6.x86_64.rpmКод: Выделить всё
[raven@server ~]$ sudo mkdir -p /var/cache/ccache/tmp
[raven@server ~]$ sudo chmod o+rwx /var/cache/ccache/
[raven@server ~]$ sudo chmod 777 /var/cache/ccache/tmp
[raven@server ~]$ rpmbuild -ta courier-imap-4.9.3.tar.bz2 # без sudo!
[raven@server ~]$ cd $HOME/rpm/RPMS/x86_64
[raven@server ~]$ ls -l
-rw-r--r-- 1 raven raven 333540 Aug 11 17:38 courier-imap-4.9.3-1.x86_64.rpm
-rw-r--r-- 1 raven raven 776112 Aug 11 17:38 courier-imap-debuginfo-4.9.3-1.x86_64.rpm
[raven@server ~]$ sudo rpm -ivh courier-imap-4.9.3-1.x86_64.rpm
[raven@server ~]$ cd $HOME/downloads
[raven@server ~]$ sudo rpmbuild -ta maildrop-2.5.4.tar.bz2
[raven@server ~]$ sudo ls -l /root/rpmbuild/RPMS/x86_64
 -rw-r--r-- 1 root root 124296 Aug 11 17:27 courier-authlib-0.63.0-1.el6.x86_64.rpm
 -rw-r--r-- 1 root root 259620 Aug 11 17:27 courier-authlib-debuginfo-0.63.0-1.el6.x86_64.rpm
 -rw-r--r-- 1 root root  35044 Aug 11 17:27 courier-authlib-devel-0.63.0-1.el6.x86_64.rpm
 -rw-r--r-- 1 root root  17416 Aug 11 17:27 courier-authlib-ldap-0.63.0-1.el6.x86_64.rpm
 -rw-r--r-- 1 root root  13944 Aug 11 17:27 courier-authlib-mysql-0.63.0-1.el6.x86_64.rpm
 -rw-r--r-- 1 root root  13112 Aug 11 17:27 courier-authlib-pgsql-0.63.0-1.el6.x86_64.rpm
 -rw-r--r-- 1 root root   8316 Aug 11 17:27 courier-authlib-pipe-0.63.0-1.el6.x86_64.rpm
 -rw-r--r-- 1 root root  34168 Aug 11 17:27 courier-authlib-userdb-0.63.0-1.el6.x86_64.rpm
 -rw-r--r-- 1 root root 281328 Aug 11 17:47 maildrop-2.5.4-1.x86_64.rpm
 -rw-r--r-- 1 root root 717476 Aug 11 17:47 maildrop-debuginfo-2.5.4-1.x86_64.rpm
 -rw-r--r-- 1 root root 101156 Aug 11 17:47 maildrop-devel-2.5.4-1.x86_64.rpm
 -rw-r--r-- 1 root root  63744 Aug 11 17:47 maildrop-man-2.5.4-1.x86_64.rpm
[raven@server ~]$ sudo rpm -ivh /root/rpmbuild/RPMS/x86_64/maildrop-2.5.4-1.x86_64.rpm
[raven@server ~]$ exit
Код: Выделить всё
[root@server ~]# service courier-imap startКод: Выделить всё
[root@server ~]# yum install postfixКод: Выделить всё
[root@server ~]# chkconfig --levels 235 mysqld on
[root@server ~]# service mysqld startКод: Выделить всё
[root@server ~]# chkconfig --levels 235 sendmail off
[root@server ~]# chkconfig --levels 235 postfix on
[root@server ~]# service sendmail stop
[root@server ~]# service postfix startКод: Выделить всё
[root@server ~]# cd /tmp
[root@server ~]# wget http://pyropus.ca/software/getmail/old-versions/getmail-4.20.3.tar.gz
[root@server ~]# tar xvfz getmail-4.20.3.tar.gz
[root@server ~]# cd getmail-4.20.3
[root@server ~]# python setup.py build
[root@server ~]# python setup.py installЯ настраивал муську используя mysql_secure_installation, хотя другие варианты настройки не возбраняются.
Код: Выделить всё
[root@server tmp]# mysql_secure_installation
 NOTE: RUNNING ALL PARTS OF THIS SCRIPT IS RECOMMENDED FOR ALL MySQL
       SERVERS IN PRODUCTION USE!  PLEASE READ EACH STEP CAREFULLY!


 In order to log into MySQL to secure it, we'll need the current
 password for the root user.  If you've just installed MySQL, and
 you haven't set the root password yet, the password will be blank,
 so you should just press enter here.

 Enter current password for root (enter for none):
 OK, successfully used password, moving on...

 Setting the root password ensures that nobody can log into the MySQL
 root user without the proper authorisation.

 Set root password? [Y/n] <-- ENTER
New password: <-- ваш_пароль
Re-enter new password: <-- ваш_пароль
Password updated successfully!
 Reloading privilege tables..
  ... Success!


 By default, a MySQL installation has an anonymous user, allowing anyone
 to log into MySQL without having to have a user account created for
 them.  This is intended only for testing, and to make the installation
 go a bit smoother.  You should remove them before moving into a
 production environment.

 Remove anonymous users? [Y/n] <-- ENTER
 ... Success!

 Normally, root should only be allowed to connect from 'localhost'.  This
 ensures that someone cannot guess at the root password from the network.

 Disallow root login remotely? [Y/n] <-- ENTER
 ... Success!

 By default, MySQL comes with a database named 'test' that anyone can
 access.  This is also intended only for testing, and should be removed
 before moving into a production environment.

 Remove test database and access to it? [Y/n] <-- ENTER
 - Dropping test database...
  ... Success!
  - Removing privileges on test database...
  ... Success!

 Reloading the privilege tables will ensure that all changes made so far
 will take effect immediately.

 Reload privilege tables now? [Y/n] <-- ENTER
 ... Success!

 Cleaning up...

 All done!  If you've completed all of the above steps, your MySQL
 installation should now be secure.

 Thanks for using MySQL!

[root@server tmp]#Код: Выделить всё
#
#  Web application to manage MySQL
#

#<Directory "/usr/share/phpmyadmin">
#  Order Deny,Allow
#  Deny from all
#  Allow from 127.0.0.1
#</Directory>

Alias /phpmyadmin /usr/share/phpmyadmin
Alias /phpMyAdmin /usr/share/phpmyadmin
Alias /mysqladmin /usr/share/phpmyadmin
Код: Выделить всё
[root@server tmp]# nano /usr/share/phpmyadmin/config.inc.php
[...]
/* Authentication type */
$cfg['Servers'][$i]['auth_type'] = 'http';
[...]Код: Выделить всё
[root@server tmp]# chkconfig --levels 235 httpd on
[root@server tmp]# service httpd startСтавим Amavisd-new, SpamAssassin и ClamAV
Код: Выделить всё
[root@server tmp]# yum install amavisd-new spamassassin clamav clamd unzip bzip2 unrar perl-DBD-mysqlИ запускаем все это хозяйство
Код: Выделить всё
[root@server tmp]# sa-update
[root@server tmp]# chkconfig --levels 235 amavisd on
[root@server tmp]# chkconfig --levels 235 clamd on
[root@server tmp]# /usr/bin/freshclam
[root@server tmp]# service amavisd start
[root@server tmp]# service clamd startКод: Выделить всё
[root@server tmp]# yum install php php-devel php-gd php-imap php-ldap php-mysql php-odbc php-pear php-xml php-xmlrpc php-eaccelerator php-mbstring php-mcrypt php-mssql php-snmp php-soap php-tidy curl curl-devel perl-libwww-perl ImageMagick libxml2 libxml2-devel mod_fcgid php-cli httpd-develКод: Выделить всё
[root@server tmp]# vi /etc/php.ini
[...]
;error_reporting = E_ALL & ~E_DEPRECATED
error_reporting = E_ALL & ~E_NOTICE
[...]
; cgi.fix_pathinfo provides *real* PATH_INFO/PATH_TRANSLATED support for CGI.  PHP's
; previous behaviour was to set PATH_TRANSLATED to SCRIPT_FILENAME, and to not grok
; what PATH_INFO is.  For more information on PATH_INFO, see the cgi specs.  Setting
; this to 1 will cause PHP CGI to fix its paths to conform to the spec.  A setting
; of zero causes PHP to behave as before.  Default is 1.  You should fix your scripts
; to use SCRIPT_FILENAME rather than PATH_TRANSLATED.
; http://www.php.net/manual/en/ini.core.php#ini.cgi.fix-pathinfo
cgi.fix_pathinfo=1
[...]Код: Выделить всё
[root@server tmp]# wget http://suphp.org/download/suphp-0.7.1.tar.gz
[root@server tmp]# tar xvfz suphp-0.7.1.tar.gz
[root@server suphp-0.7.1]# cd suphp-0.7.1/
[root@server suphp-0.7.1]# ./configure --prefix=/usr --sysconfdir=/etc --with-apr=/usr/bin/apr-1-config --with-apxs=/usr/sbin/apxs --with-apache-user=apache --with-setid-mode=owner --with-php=/usr/bin/php-cgi --with-logfile=/var/log/httpd/suphp_log --enable-SUPHP_USE_USERGROUP=yes
[root@server suphp-0.7.1]# make -j16 (у меня 16 ядер, у вас этот параметр может отличаться, будьте с ним осторожнее!)
[root@server suphp-0.7.1]# make install
[root@server suphp-0.7.1]# cd /tmpКод: Выделить всё
[root@server tmp]# vi /etc/httpd/conf.d/suphp.conf
LoadModule suphp_module modules/mod_suphp.soКод: Выделить всё
[root@server tmp]# vi /etc/suphp.conf
[global]
;Path to logfile
logfile=/var/log/httpd/suphp.log
;Loglevel
loglevel=info
;User Apache is running as
webserver_user=apache
;Path all scripts have to be in
docroot=/
;Path to chroot() to before executing script
;chroot=/mychroot
; Security options
allow_file_group_writeable=true
allow_file_others_writeable=false
allow_directory_group_writeable=true
allow_directory_others_writeable=false
;Check wheter script is within DOCUMENT_ROOT
check_vhost_docroot=true
;Send minor error messages to browser
errors_to_browser=false
;PATH environment variable
env_path=/bin:/usr/bin
;Umask to set, specify in octal notation
umask=0077
; Minimum UID
min_uid=100
; Minimum GID
min_gid=100

[handlers]
;Handler for php-scripts
x-httpd-suphp="php:/usr/bin/php-cgi"
;Handler for CGI-scripts
x-suphp-cgi="execute:!self"Код: Выделить всё
[root@server tmp]# service httpd restartХоть мы и используем FastCGI который сам по себе неплохо контачит с Ruby, но поскольку мы не используем веб-сервер Lighttpd придется настроить все это дело через модуль mod_ruby для апача.
Устанавливаем все необходимое:
Код: Выделить всё
[root@server tmp]# yum install httpd-devel ruby ruby-develКод: Выделить всё
[root@server tmp]# wget http://modruby.net/archive/mod_ruby-1.3.0.tar.gz
[root@server tmp]# tar zxvf mod_ruby-1.3.0.tar.gz
[root@server tmp]# cd mod_ruby-1.3.0/
[root@server mod_ruby-1.3.0]# ./configure.rb --with-apr-includes=/usr/include/apr-1
[root@server mod_ruby-1.3.0]# make -j16
[root@server mod_ruby-1.3.0]# make install
[root@server suphp-0.7.1]# cd /tmpКод: Выделить всё
[root@server tmp]# vi /etc/httpd/conf.d/ruby.conf
LoadModule ruby_module modules/mod_ruby.so
RubyAddPath /1.8
Код: Выделить всё
[root@server tmp]# service httpd restartНеобходимые модули уже должны быть подключены в apache. Проверить можно командой:
Код: Выделить всё
[root@server tmp]# cat /etc/httpd/conf/httpd.conf
[...]
LoadModule auth_digest_module modules/mod_auth_digest.so
[...]
LoadModule dav_module modules/mod_dav.so
[...]
LoadModule dav_fs_module modules/mod_dav_fs.so
[...]PureFTPd
Устанавливаем PureFTPd
Код: Выделить всё
[root@server tmp]# yum install pure-ftpdКод: Выделить всё
[root@server tmp]# chkconfig --levels 235 pure-ftpd on
[root@server tmp]# service pure-ftpd startКод: Выделить всё
[root@server tmp]# yum install opensslКод: Выделить всё
[...]
# This option can accept three values :
# 0 : disable SSL/TLS encryption layer (default).
# 1 : accept both traditional and encrypted sessions.
# 2 : refuse connections that don't use SSL/TLS security mechanisms,
#     including anonymous sessions.
# Do _not_ uncomment this blindly. Be sure that :
# 1) Your server has been compiled with SSL/TLS support (--with-tls),
# 2) A valid certificate is in place,
# 3) Only compatible clients will log in.

TLS                      1
[...]Код: Выделить всё
[root@server tmp]# mkdir -p /etc/ssl/private/Код: Выделить всё
[root@server tmp]# openssl req -x509 -nodes -days 7300 -newkey rsa:2048 -keyout /etc/ssl/private/pure-ftpd.pem -out /etc/ssl/private/pure-ftpd.pem
Generating a 2048 bit RSA private key
..............................+++
...................................................................................................+++
writing new private key to '/etc/ssl/private/pure-ftpd.pem'
-----
You are about to be asked to enter information that will be incorporated
into your certificate request.
What you are about to enter is what is called a Distinguished Name or a DN.
There are quite a few fields but you can leave some blank
For some fields there will be a default value,
If you enter '.', the field will be left blank.
-----
Country Name (2 letter code) [XX]:KG
State or Province Name (full name) []:Bishkek
Locality Name (eg, city) [Default City]:Bishkek
Organization Name (eg, company) [Default Company Ltd]:Megaline
Organizational Unit Name (eg, section) []:
Common Name (eg, your name or your server's hostname) []:server.test.kg
Email Address []:admin@server.test.kg
Код: Выделить всё
[root@server tmp]# chmod 600 /etc/ssl/private/pure-ftpd.pemКод: Выделить всё
[root@server tmp]# service pureftpd restartСтавим собсно BIND:
Код: Выделить всё
[root@server tmp]# yum install bind bind-utilsКод: Выделить всё
# BIND named process options
# ~~~~~~~~~~~~~~~~~~~~~~~~~~
# Currently, you can use the following options:
#
# ROOTDIR="/var/named/chroot"  --  will run named in a chroot environment.
#                            you must set up the chroot environment
#                            (install the bind-chroot package) before
#                            doing this.
#       NOTE:
#         Those directories are automatically mounted to chroot if they are
#         empty in the ROOTDIR directory. It will simplify maintenance of your
#         chroot environment.
#          - /var/named
#          - /etc/pki/dnssec-keys
#          - /etc/named
#          - /usr/lib64/bind or /usr/lib/bind (architecture dependent)
#
#         Those files are mounted as well if target file doesn't exist in
#         chroot.
#          - /etc/named.conf
#          - /etc/rndc.conf
#          - /etc/rndc.key
#          - /etc/named.rfc1912.zones
#          - /etc/named.dnssec.keys
#          - /etc/named.iscdlv.key
#
#       Don't forget to add "$AddUnixListenSocket /var/named/chroot/dev/log"
#       line to your /etc/rsyslog.conf file. Otherwise your logging becomes
#       broken when rsyslogd daemon is restarted (due update, for example).
#
# OPTIONS="whatever"     --  These additional options will be passed to named
#                            at startup. Don't add -t here, use ROOTDIR instead.
#
# KEYTAB_FILE="/dir/file"    --  Specify named service keytab file (for GSS-TSIG)
#ROOTDIR=/var/named/chrootКод: Выделить всё
[root@server tmp]# cp /etc/named.conf /etc/named.conf_bak
[root@server tmp]# cat /dev/null > /etc/named.conf
[root@server tmp]# vi /etc/named.conf
//
// named.conf
//
// Provided by Red Hat bind package to configure the ISC BIND named(8) DNS
// server as a caching only nameserver (as a localhost DNS resolver only).
//
// See /usr/share/doc/bind*/sample/ for example named configuration files.
//
options {
        listen-on port 53 { any; };
        listen-on-v6 port 53 { any; };
        directory       "/var/named";
        dump-file       "/var/named/data/cache_dump.db";
        statistics-file "/var/named/data/named_stats.txt";
        memstatistics-file "/var/named/data/named_mem_stats.txt";
        allow-query     { any; };
        recursion yes;
};
logging {
        channel default_debug {
                file "data/named.run";
                severity dynamic;
        };
};
zone "." IN {
        type hint;
        file "named.ca";
};
include "/etc/named.conf.local";Код: Выделить всё
[root@server tmp]# touch /etc/named.conf.localКод: Выделить всё
[root@server tmp]# chkconfig --levels 235 named on
[root@server tmp]# service named startWebalizer и AWStats можно установить из репозиториев:
Код: Выделить всё
[root@server tmp]# yum install webalizer awstats perl-DateTime-Format-HTTP perl-DateTime-Format-BuilderКод: Выделить всё
[root@server tmp]# wget http://n0rp.chemlab.org/vlogger/vlogger-1.3.tar.gz
[root@server tmp]# tar xvfz vlogger-1.3.tar.gz
[root@server tmp]# mv vlogger-1.3/vlogger /usr/sbin/
[root@server tmp]# rm -rf vlogger*Jailkit необходим для того чтобы запереть юзеров в их домашней директории, если вы не предусматриваете ssh-доступ к вашему серверу то можете пропустить этот шаг.
Внимание: Jailkit необходимо устанавливать ТОЛЬКО до ISPConfig и ни в коем случае не устанавливать после! Иначе вы рискуете получить огромную дыру в вашей системе!
Код: Выделить всё
[root@server tmp]# wget http://olivier.sessink.nl/jailkit/jailkit-2.14.tar.gz
[root@server tmp]# tar xvfz jailkit-2.14.tar.gz
[root@server tmp]# cd jailkit-2.14
[root@server jailkit-2.14]# ./configure
[root@server jailkit-2.14]# make
[root@server jailkit-2.14]# make install
[root@server jailkit-2.14]# cd ..
[root@server tmp]# rm -rf jailkit-2.14*Необязательный, но рекомендуемый пункт:
Код: Выделить всё
[root@server tmp]# yum install fail2ban
[root@server tmp]# chkconfig --levels 235 fail2ban on
[root@server tmp]# service fail2ban startКод: Выделить всё
[root@server tmp]# yum install rkhunterНам понадобится веб-морда для почтаря. Ставим белку)))
Код: Выделить всё
[root@server tmp]# yum install squirrelmailКод: Выделить всё
[root@server tmp]# service httpd restartКод: Выделить всё
[root@server tmp]# /usr/share/squirrelmail/config/conf.pl
We must tell SquirrelMail that we are using Courier-IMAP/-POP3:

SquirrelMail Configuration : Read: config.php (1.4.0)
 ---------------------------------------------------------
 Main Menu --
 1.  Organization Preferences
 2.  Server Settings
 3.  Folder Defaults
 4.  General Options
 5.  Themes
 6.  Address Books
 7.  Message of the Day (MOTD)
 8.  Plugins
 9.  Database
 10. Languages

 D.  Set pre-defined settings for specific IMAP servers

 C   Turn color off
 S   Save data
 Q   Quit

 Command >> <-- D


SquirrelMail Configuration : Read: config.php
 ---------------------------------------------------------
 While we have been building SquirrelMail, we have discovered some
 preferences that work better with some servers that don't work so
 well with others.  If you select your IMAP server, this option will
 set some pre-defined settings for that server.

 Please note that you will still need to go through and make sure
 everything is correct.  This does not change everything.  There are
 only a few settings that this will change.

 Please select your IMAP server:
     bincimap    = Binc IMAP server
     courier     = Courier IMAP server
     cyrus       = Cyrus IMAP server
     dovecot     = Dovecot Secure IMAP server
     exchange    = Microsoft Exchange IMAP server
     hmailserver = hMailServer
     macosx      = Mac OS X Mailserver
     mercury32   = Mercury/32
     uw          = University of Washington's IMAP server
     gmail       = IMAP access to Google mail (Gmail) accounts

     quit        = Do not change anything
 Command >> <-- courier

               imap_server_type = courier
          default_folder_prefix = INBOX.
                   trash_folder = Trash
                    sent_folder = Sent
                   draft_folder = Drafts
             show_prefix_option = false
           default_sub_of_inbox = false
 show_contain_subfolders_option = false
             optional_delimiter = .
                  delete_folder = true

 Press any key to continue... <-- press ENTER


SquirrelMail Configuration : Read: config.php (1.4.0)
 ---------------------------------------------------------
 Main Menu --
 1.  Organization Preferences
 2.  Server Settings
 3.  Folder Defaults
 4.  General Options
 5.  Themes
 6.  Address Books
 7.  Message of the Day (MOTD)
 8.  Plugins
 9.  Database
 10. Languages

 D.  Set pre-defined settings for specific IMAP servers

 C   Turn color off
 S   Save data
 Q   Quit

 Command >> <--S


SquirrelMail Configuration : Read: config.php (1.4.0)
 ---------------------------------------------------------
 Main Menu --
 1.  Organization Preferences
 2.  Server Settings
 3.  Folder Defaults
 4.  General Options
 5.  Themes
 6.  Address Books
 7.  Message of the Day (MOTD)
 8.  Plugins
 9.  Database
 10. Languages

 D.  Set pre-defined settings for specific IMAP servers

 C   Turn color off
 S   Save data
 Q   Quit

Command >> <--QКод: Выделить всё
<?php
/**
* Local config overrides.
*
* You can override the config.php settings here.
* Don't do it unless you know what you're doing.
* Use standard PHP syntax, see config.php for examples.
*
* @copyright © 2002-2006 The SquirrelMail Project Team
* @license http://opensource.org/licenses/gpl-license.php GNU Public License
* @version $Id: config_local.php,v 1.2 2006/07/11 03:33:47 wtogami Exp $
* @package squirrelmail
* @subpackage config
*/
//$default_folder_prefix = '';
?>Ну и самое основное - ставим ISPConfig 3
Код: Выделить всё
[root@server tmp]# wget http://www.ispconfig.org/downloads/ISPConfig-3-stable.tar.gz
[root@server tmp]# tar xfz ISPConfig-3-stable.tar.gz
[root@server tmp]# cd ispconfig3_install/install/
[root@server1 install]# php -q install.php
--------------------------------------------------------------------------------
_____ ___________ _____ __ _ ____
|_ _/ ___| ___ \ / __ \ / _(_) /__ \
| | \ `--.| |_/ / | / \/ ___ _ __ | |_ _ __ _ _/ /
| | `--. \ __/ | | / _ \| '_ \| _| |/ _` | |_ |
_| |_/\__/ / | | \__/\ (_) | | | | | | | (_| | ___\ \
\___/\____/\_| \____/\___/|_| |_|_| |_|\__, | \____/
__/ |
|___/
--------------------------------------------------------------------------------
>> Initial configuration
Operating System: Redhat or compatible, unknown version.
Following will be a few questions for primary configuration so be careful.
Default values are in [brackets] and can be accepted with <ENTER>.
Tap in "quit" (without the quotes) to stop the installer.
Select language (en,de) [en]: <-- ENTER
Installation mode (standard,expert) [standard]: <-- ENTER
Full qualified hostname (FQDN) of the server, eg server1.domain.tld [server1.example.com]: <-- ENTER
MySQL server hostname [localhost]: <-- ENTER
MySQL root username [root]: <-- ENTER
MySQL root password []: <-- ваш_пасс_от_мускуля
MySQL database to create [dbispconfig]: <-- ENTER
MySQL charset [utf8]: <-- ENTER
Generating a 2048 bit RSA private key
...................................+++
.................................................+++
writing new private key to 'smtpd.key'
-----
You are about to be asked to enter information that will be incorporated
into your certificate request.
What you are about to enter is what is called a Distinguished Name or a DN.
There are quite a few fields but you can leave some blank
For some fields there will be a default value,
If you enter '.', the field will be left blank.
-----
Country Name (2 letter code) [XX]: <-- ENTER
State or Province Name (full name) []: <-- ENTER
Locality Name (eg, city) [Default City]: <-- ENTER
Organization Name (eg, company) [Default Company Ltd]: <-- ENTER
Organizational Unit Name (eg, section) []: <-- ENTER
Common Name (eg, your name or your server's hostname) []: <-- ENTER
Email Address []: <-- ENTER
Configuring Jailkit
Configuring SASL
Configuring PAM
Configuring Courier
Configuring Spamassassin
Configuring Amavisd
Configuring Getmail
Configuring Pureftpd
Configuring BIND
Configuring Apache
Configuring Vlogger
Configuring Apps vhost
Configuring Firewall
Installing ISPConfig
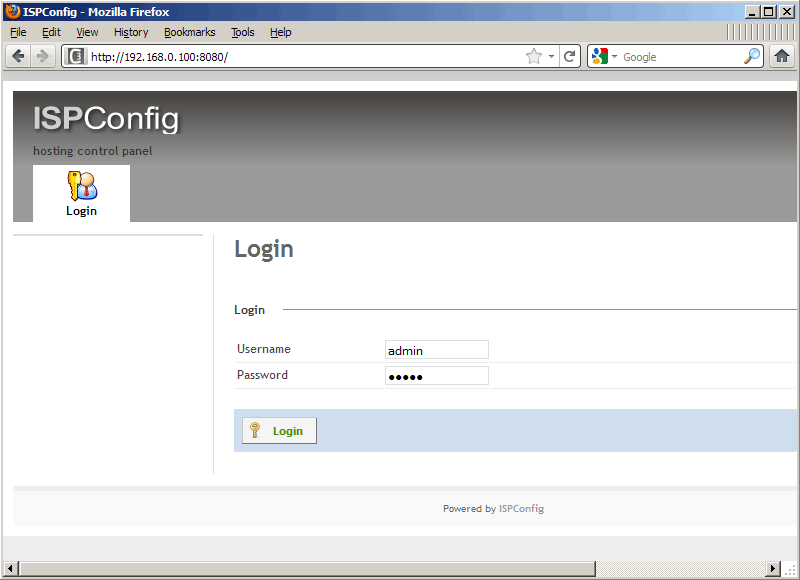
ISPConfig Port [8080]: <-- ENTER
Configuring DBServer
Installing ISPConfig crontab
no crontab for root
no crontab for getmail
Restarting services ...
Stopping mysqld: [ OK ]
Starting mysqld: [ OK ]
Shutting down postfix: [ OK ]
Starting postfix: [ OK ]
Stopping saslauthd: [FAILED]
Starting saslauthd: [ OK ]
Shutting down amavisd: Daemon [16439] terminated by SIGTERM
[ OK ]
amavisd stopped
Starting amavisd: [ OK ]
Stopping clamd.amavisd: [ OK ]
Starting clamd.amavisd: [ OK ]
Stopping Courier authentication services: authdaemond
Starting Courier authentication services: authdaemond
Stopping Courier-IMAP server: imap imap-ssl pop3 pop3-ssl
Starting Courier-IMAP server: imap imap-ssl pop3 pop3-ssl
Stopping Courier-IMAP server: imap imap-ssl pop3 pop3-ssl
Starting Courier-IMAP server: imap imap-ssl pop3 pop3-ssl
Stopping Courier-IMAP server: imap imap-ssl pop3 pop3-ssl
Starting Courier-IMAP server: imap imap-ssl pop3 pop3-ssl
Stopping Courier-IMAP server: imap imap-ssl pop3 pop3-ssl
Starting Courier-IMAP server: imap imap-ssl pop3 pop3-ssl
Stopping httpd: [ OK ]
[Tue Aug 02 21:19:40 2011] [warn] NameVirtualHost *:80 has no VirtualHosts
Starting httpd: [ OK ]
Stopping pure-ftpd: [ OK ]
Starting pure-ftpd: [ OK ]
Installation completed.
[root@server install]#